A couple weekends ago, my girlfriend and myself came up with the idea to make custom bookshelf using milk-crates. We didn’t actually have any milk crates, so we had to scour sites like Kijiji and Craigslist to find people in our area giving them away, or selling them cheaply. We also aquired some from a small corner store we visit frequently, first for free, then having to pay small amounts for them until we cleared them out!
Making this bookshelf will be pretty straightforward, and you don’t need many tools or additional items to make it. And, all you really need for this design is a total of 6 milk crates. However, this can change based on your design or what you plan on extending it to.
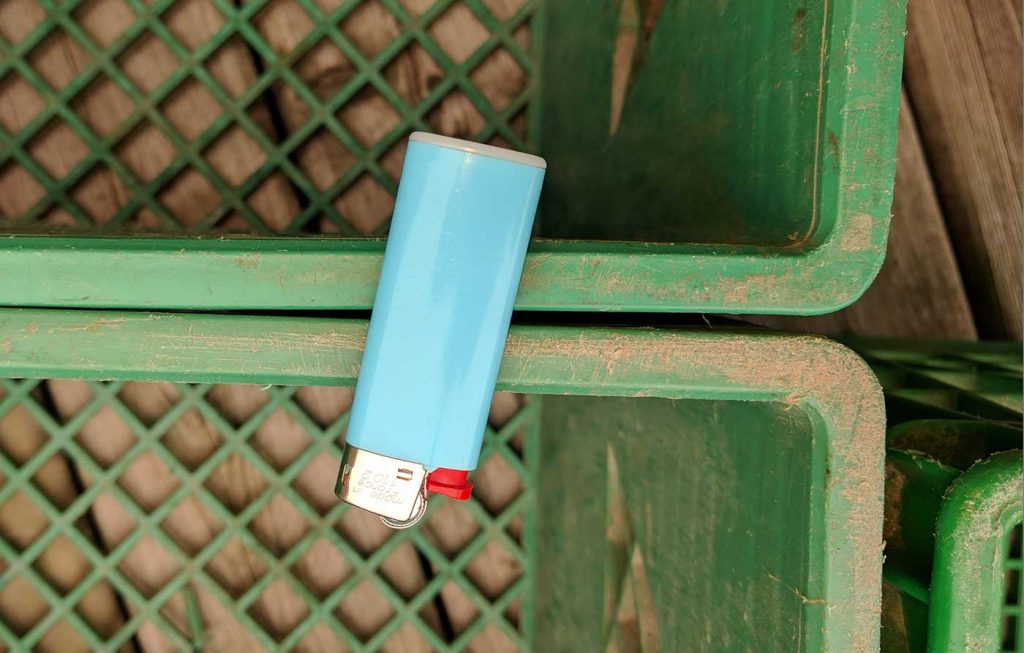
First we had to figure out how wide the two milkcrates pushed together would be, so my fiance decided to use a small lighter to visualize the width before heading over to the home store. Not sure if this is the best method, but it seemed to work – lol!
So, let’s get down to business and start building this thing!
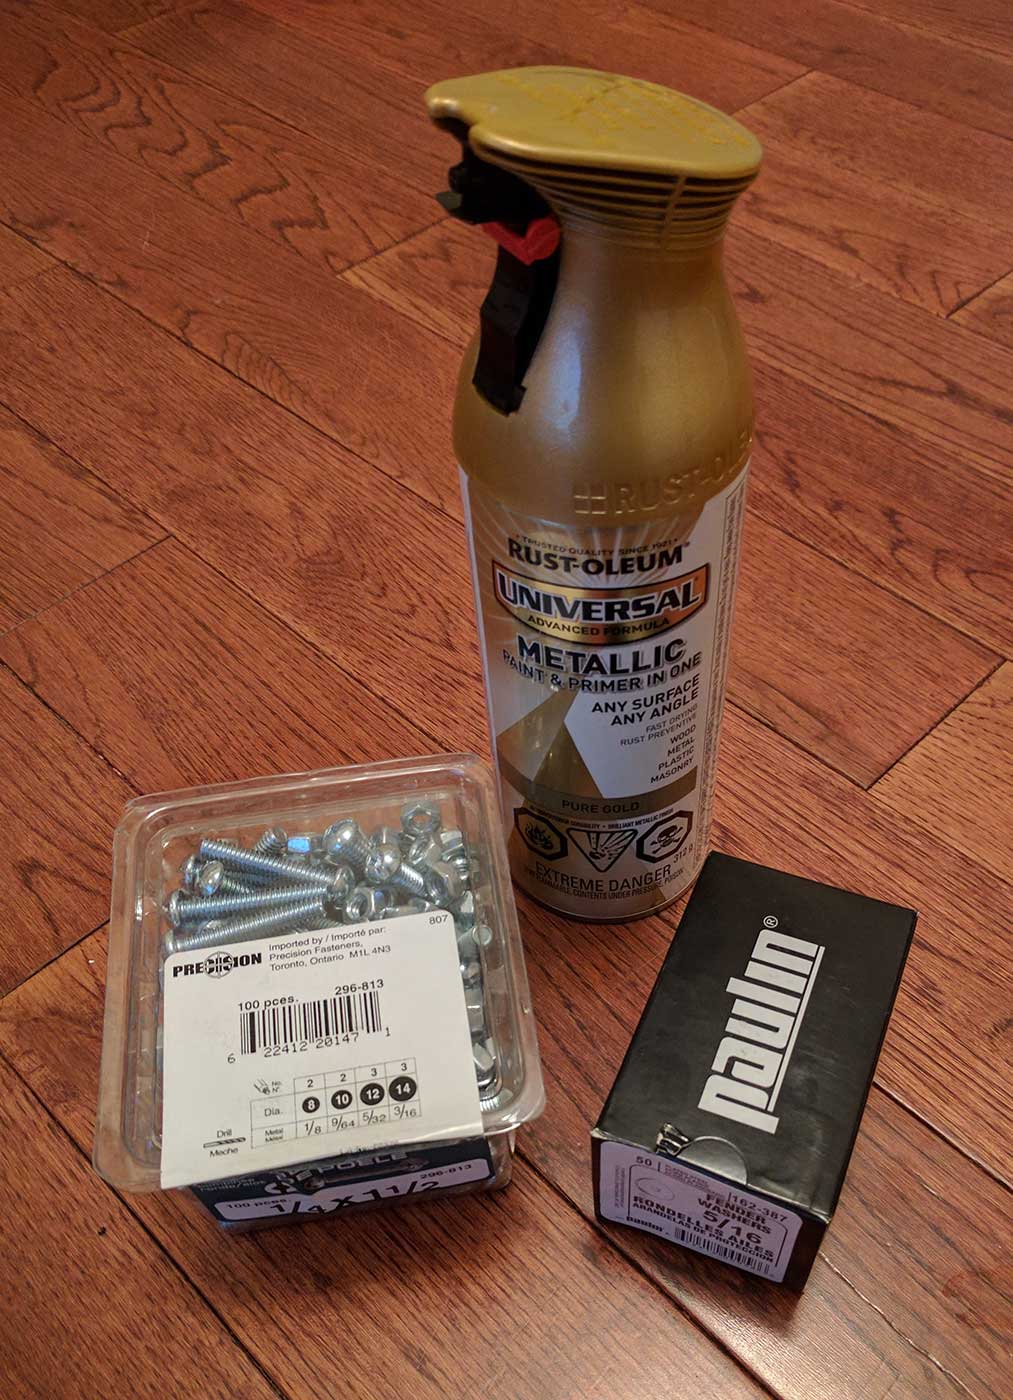
Here’s the list of stuff we had to procure.
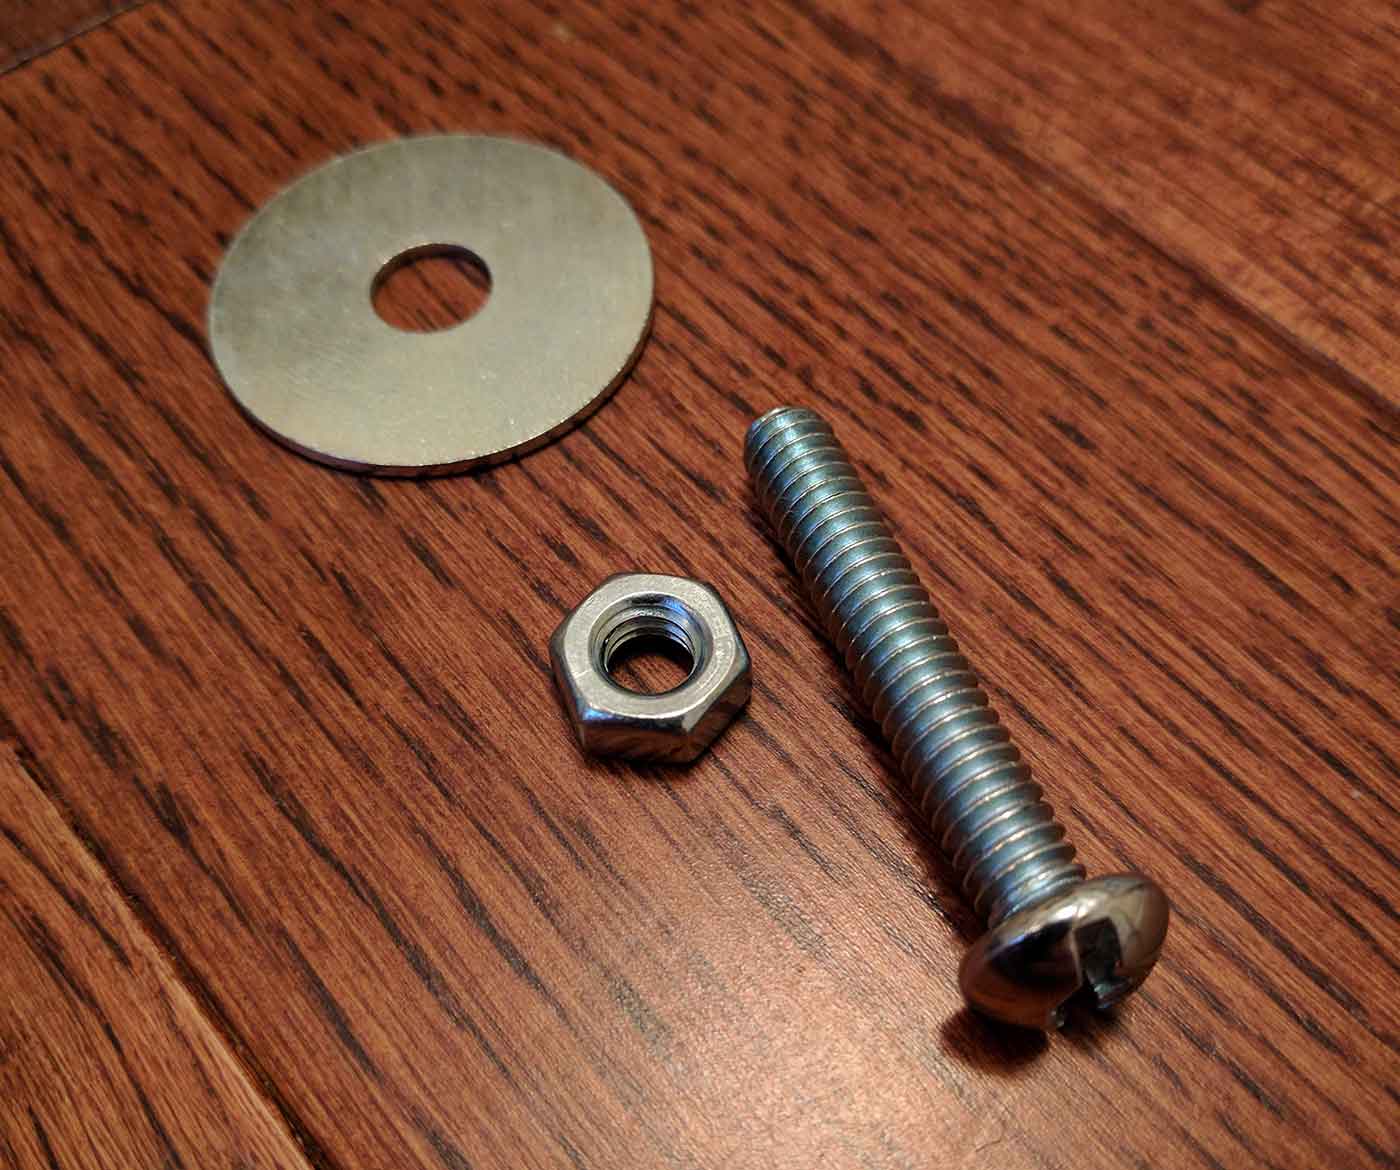
- Box of 1.5" by 1/4" stove bolts, with nuts. We got the box of 100 total nuts and bolts.
- Box of 5/16" fender washers (small hole, big disc)
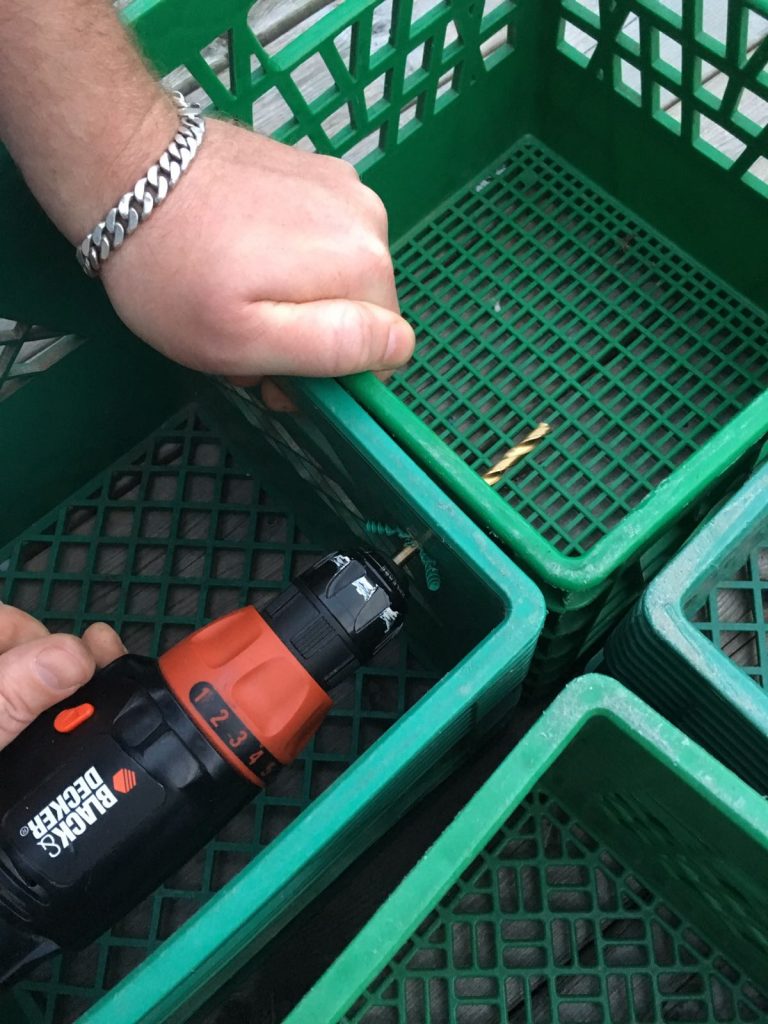
- Drill + drill bit (depending on bolt location)
- Vice Grips, Wrench or (ugh!) Pliers to hold the bolt
- 1 or 2 bottles of spray paint of your choosing. We picked Gold cause bling!

Now that you have parts procuredand ready
So, now you’re going to want to lay out your shelf. Make sure to keep in mind that you may need to get it up, and down stairs or around tight corners. So, don’t make it too long, or, assemble it in it’s final resting place.
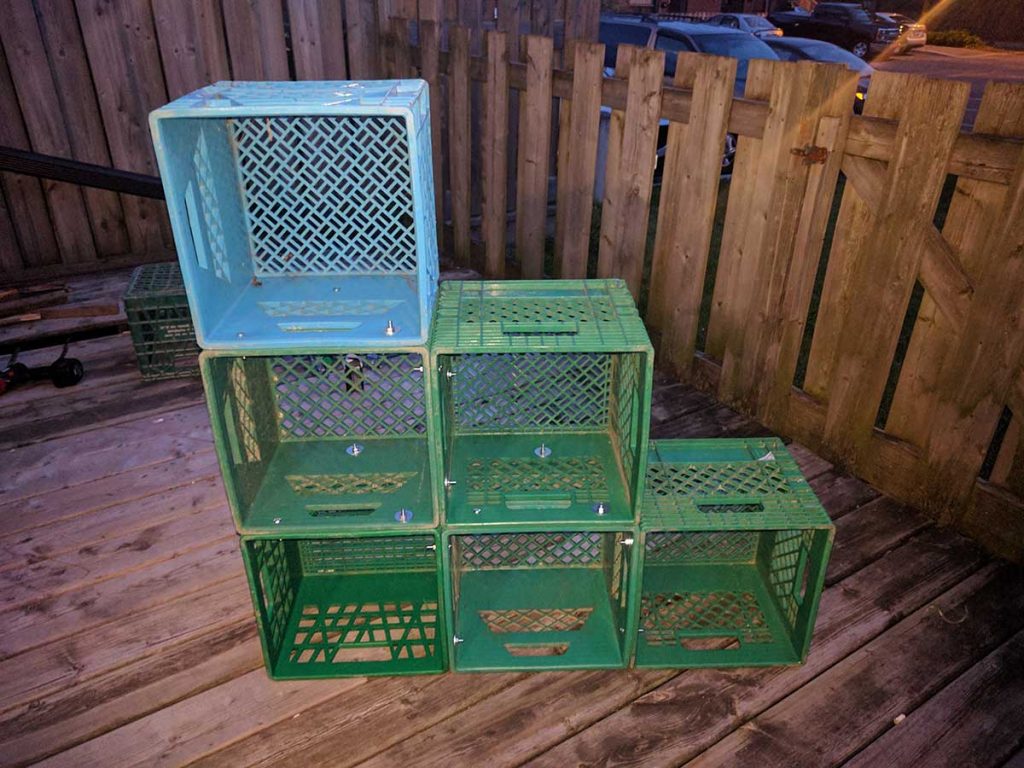
For our design, we chose to make a ‘staircase’ or ’triangle’ out of the milk-crates, using 6 crates in total. This allows us to have it sitting in a triangle formation on the ground with shoe or other storage below, and 6 large spaces for books that will show up on an angle. You could also put it in a ‘staircase’ format up the wall, and have top shelves available for plants or other accessories.
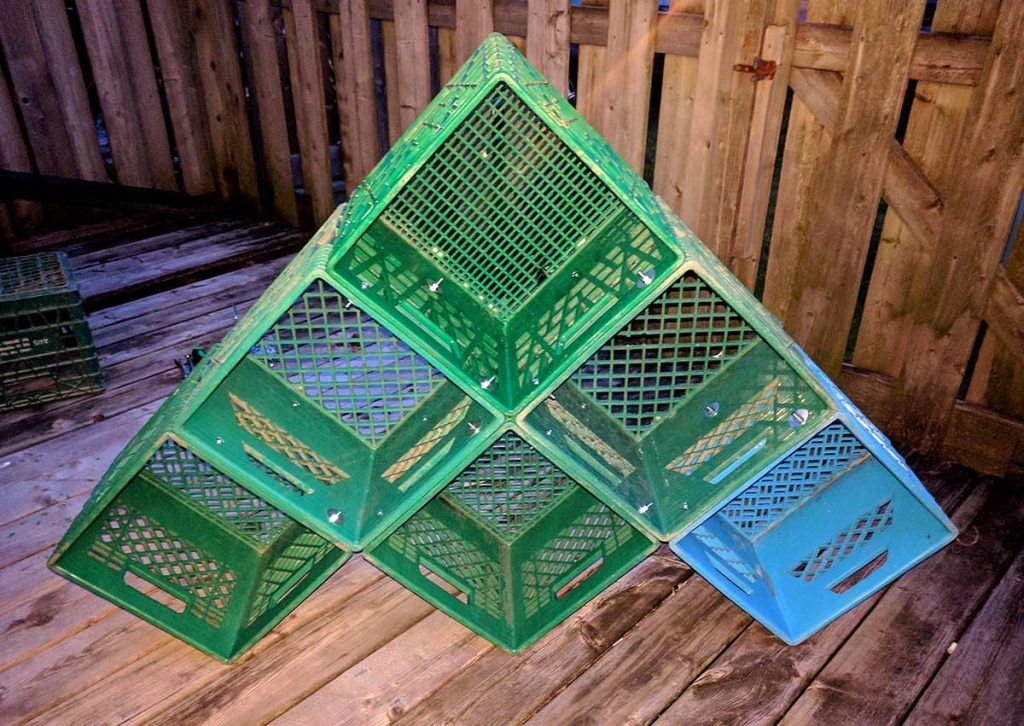
So, once you have your design finalized (maybe you want to make an atari spaceship, or a rectangle, or whatever) lay out your milk crates in the design you want to get together.
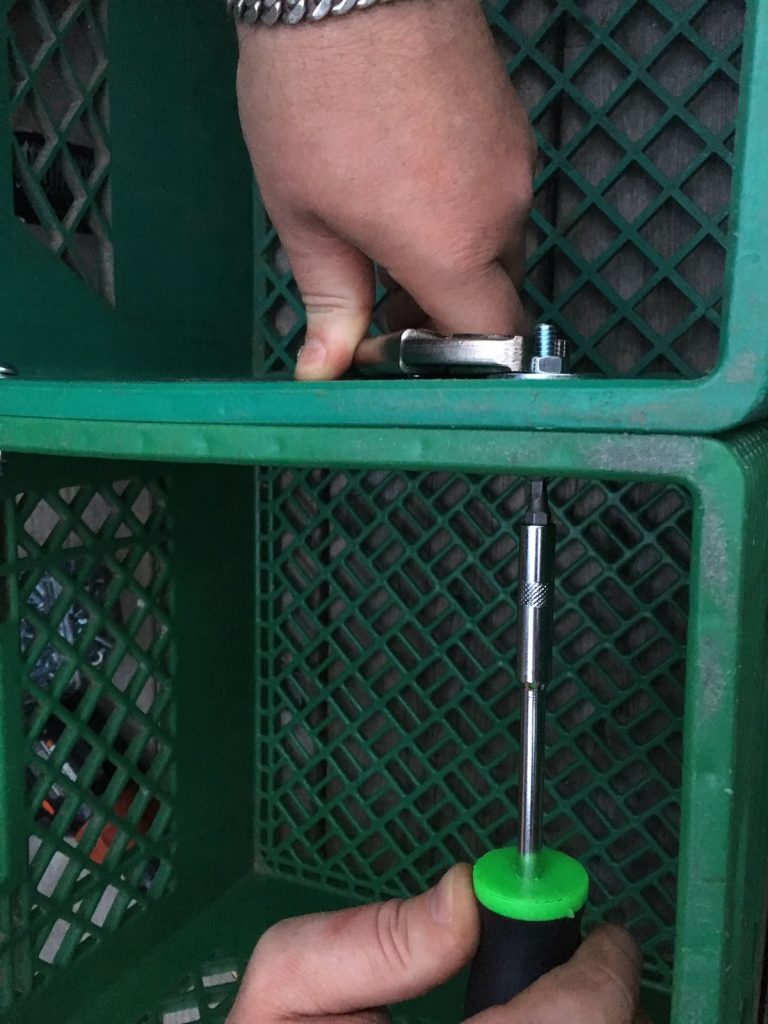
Figure out where you want to put the bolts into the milk crates that will join them together securely, and easily. We chose to put 3 bolts per join, so in total we used this to secure ours (6 join spots):
- 18 Bolts
- 18 Nuts
- 18 Washers
This is what we did to join ours together
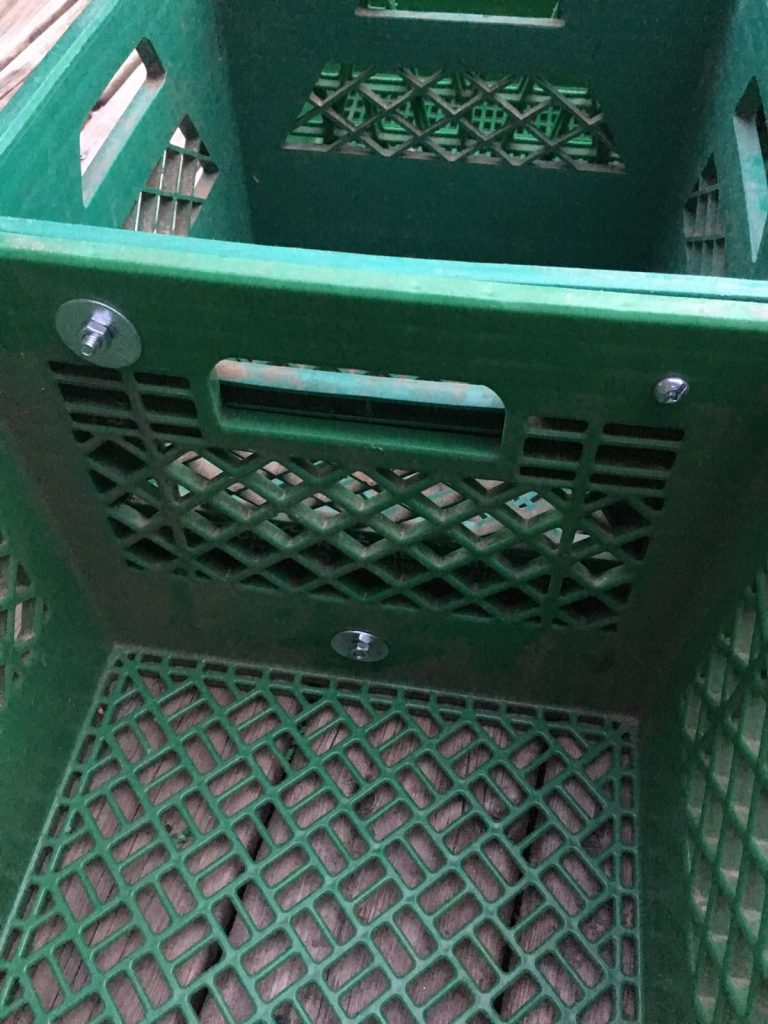
Ended up looking like this, nice and tight!
What did it all cost?
- Milk Crates – Free + $10
- 2 Cans of spray paint– $25.58
- Fender Washers – $11.65 (50 qty) ($4.14 cost for the whole shelf)
- Stove Bolts+ Nuts – $15.61 (100 qty) ($2.88 cost for thiswhole shelf)
Grand total of $42.60 with plenty of nuts/bolts/washers for more shelves!