Clean and Repair Your Vestax VCI-100 Cross Fader on the Cheap
Like me you might have a VCI-100 that you use almost daily to spin tracks and practice mixing. They’re great little units for this, but do sometimes have issues with the cross fader.
After extended use, you may notice the cross fader will start sticking or even worse like what happened to me will start jumping back and forth making it virtually impossible to mix.
What do you do?
Buy another cross fader? Sure, if you’re rich and have time to wait for one to come in the mail.
I’ve got a better solution though. Remember the days before the credit card and Internet when we actually had to fix things for ourselves? Well, that’s what I did. Old-school FTW!
Before getting yourself a new cross fader (which, by the way are nearly impossible to find – I had to send a message directly to Vestax to find a local distributor to order another one from) you might as well try cleaning your current one first.
The process is pretty simple, and not very many tools are required.
Let’s get down to business shall we;
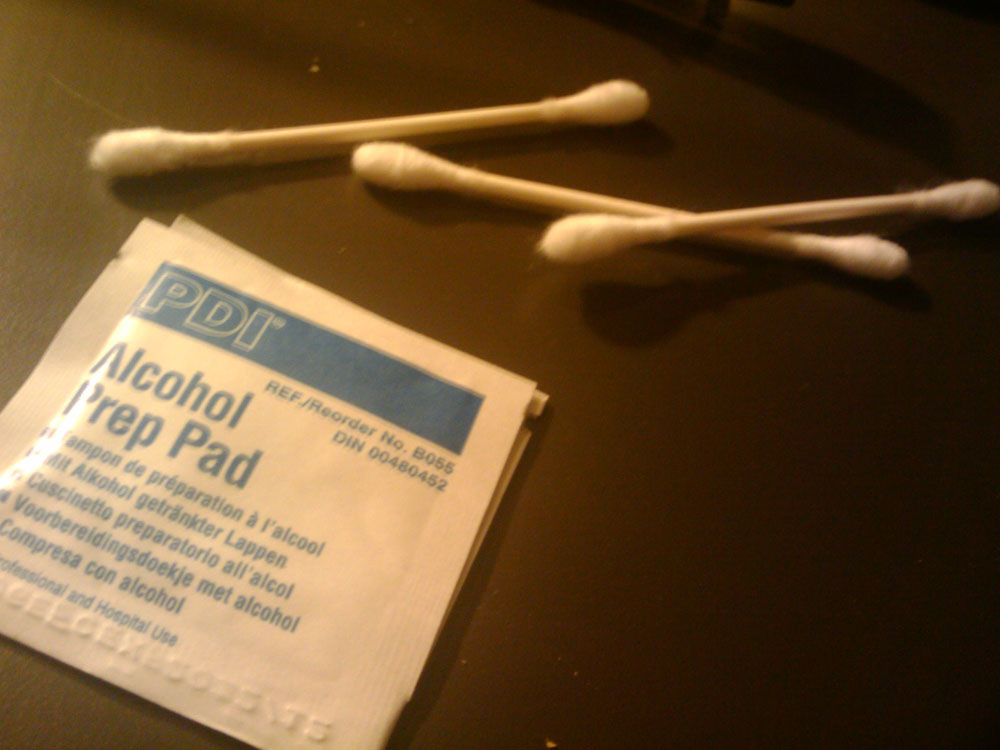
TOOLS REQUIRED:
- Soldering Gun
- Solder
- Very small flat tipped screwdriver.
- Small Phillips Screwdriver
- Q-Tips
- Rubbing Alcohol
- 20 Minutes of your time.
OPENING THE VCI-100:
First step is to remove the four screws surrounding the VCI-100. You can find these on the left, and right hand side of the unit along the side. There will be two on the left, and two on the right. Once you’ve completed that, flip the unit over and remove the final screw in the bottom that holds the entire case together.
I won’t go into too much detail on this as DJ Tech Tools has an awesome video up that shows you exactly what to do and how to upgrade your firmware if you want too. You can check it out here.
After you’ve successfully removed the case you’re going to want to remove the cross fader unit from the VCI-100.
Beside the cross fader to the left and right, are two small silver screws. Unscrew these, and then remove the fader knob and the cross fader will fall out of the bottom of the VCI-100.
Now you can flip the unit upside down, and get your small screwdriver. With the screwdriver, carefully pry off the wiring harness that connects the cross fader to your VCI-100 unit.
You can now set the VCI-100 aside and begin the work of cleaning your cross fader.
CLEANING VCI-100 CROSSFADER
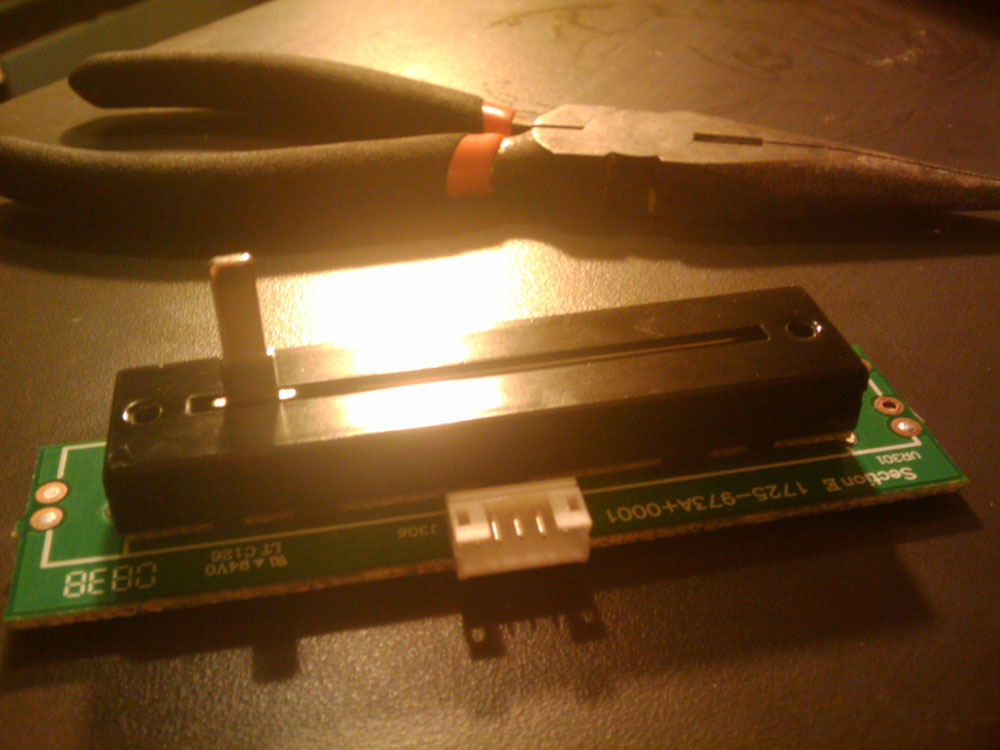
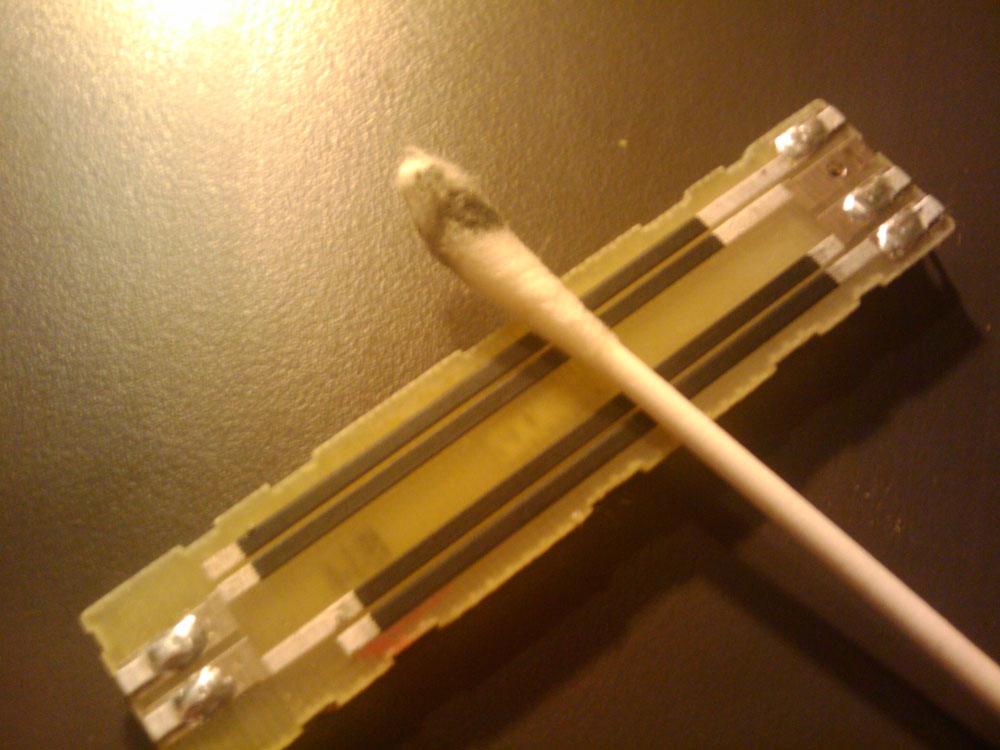
After removing the wires, you will have something that looks like this sitting on your desk. You’ll notice that one side of the black container has a word printed on it. Note which way this is facing (for me, it was facing towards the wire connector). You’re going to want to put it back together exactly as it was before you took it apart. You’ve been warned.
You’ll notice that the unit has 5 solder points. 3 on the left, and 2 on the right. This is where you’re going to want to whip out your soldering gun, and gently remove the solder from each of these points and pry off the cross fader unit.
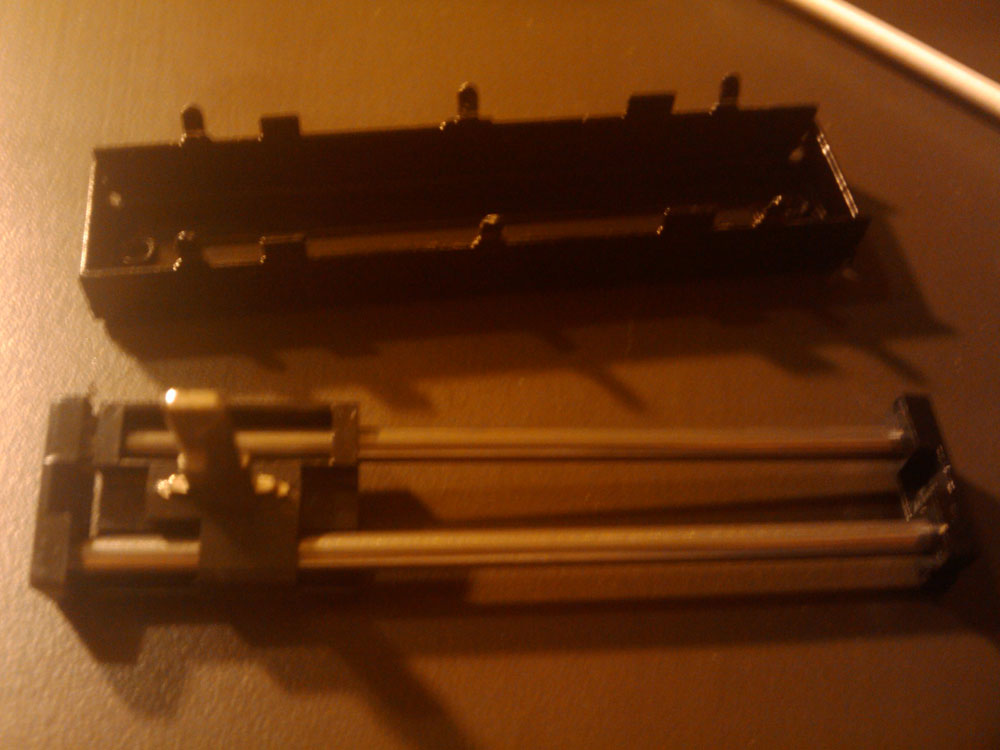
Following that, you should have something like this laying on your table.
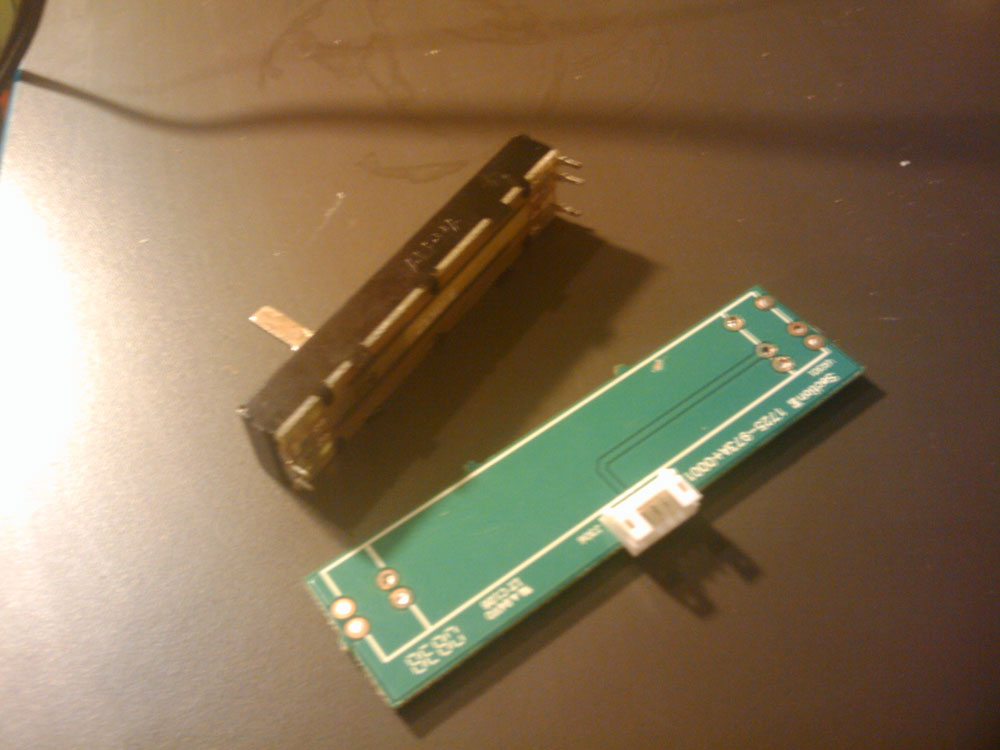
Now you will notice that the black piece has some little bits of metal that have been crushed in around the circuit board. You’ll want to GENTLY pry these away with your small screwdriver – being careful not to break them as they are quite brittle and can easily snap.
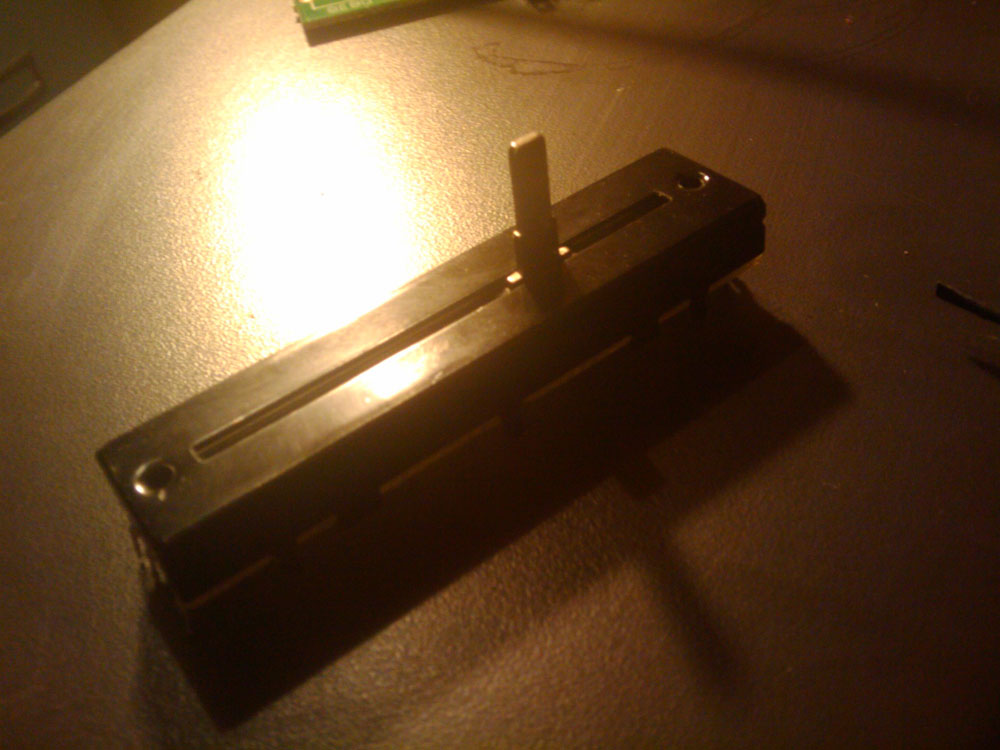
Once you’ve successfully pried away the metal from the circuit board under the cross fader, you can gently pull off the black casing which will leave you with something similar to this laying on your table.
Now you’ll want to get your q-tips and your alcohol ready. I didn’t have a bottle of rubbing alcohol, so I macgyvered the situation and used alcohol pads from my first aid kit. I’ll probably kick myself for that one later, but mixing is more important right?
After getting your q-tips, alcohol and the cross fader ready for cleaning you can now get started.
I started by putting some alcohol on the qtip and gently wiping down the circuit board that the cross fader sits on. It brought up a lot of gunk and turned three qtips completely black. Not sure what was up there, but at the end my white q-tip stayed white so I was satisfied that I’d cleaned it enough.
Now is the fun part and remembering how everything fits back together. After cleaning the contacts on the circuit board, you’re also going to want to clean the runners that the cross fader actually sits on and uses to move back and forth.
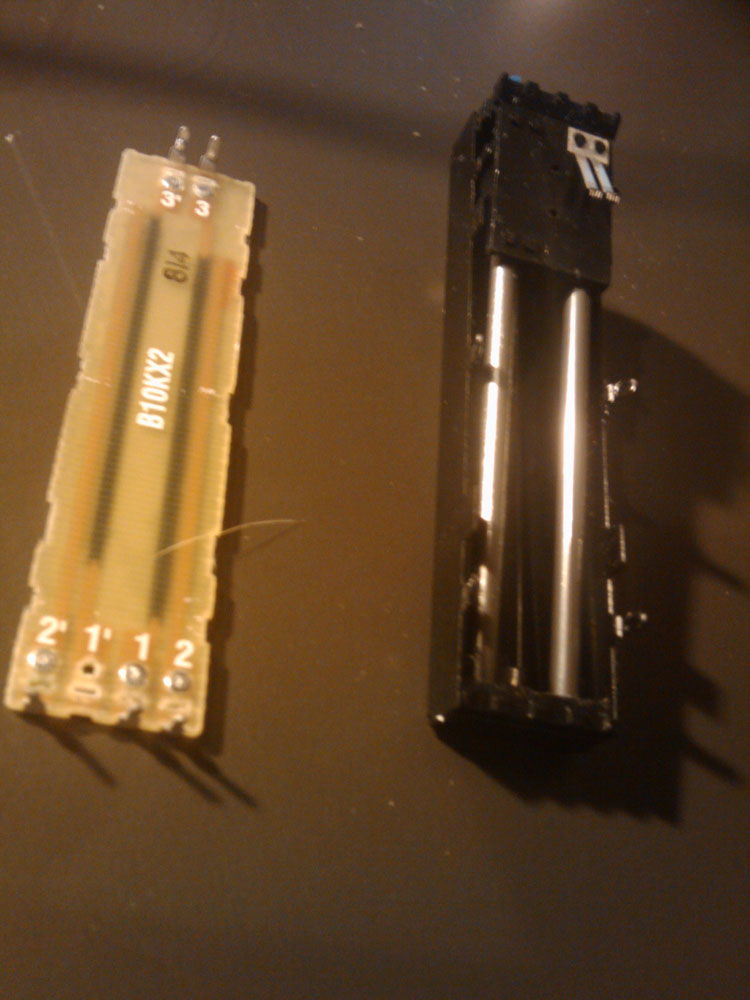
Your cross fading unit will come apart completely if you flip over the black housing you removed from the circuit board and then flip out the bars and the plastic holding units. Make sure you note which way everything is facing so you can put it back together properly. I say this because I didn’t the first time and it sucked when I put the VCI-100 back together and nothing was working.
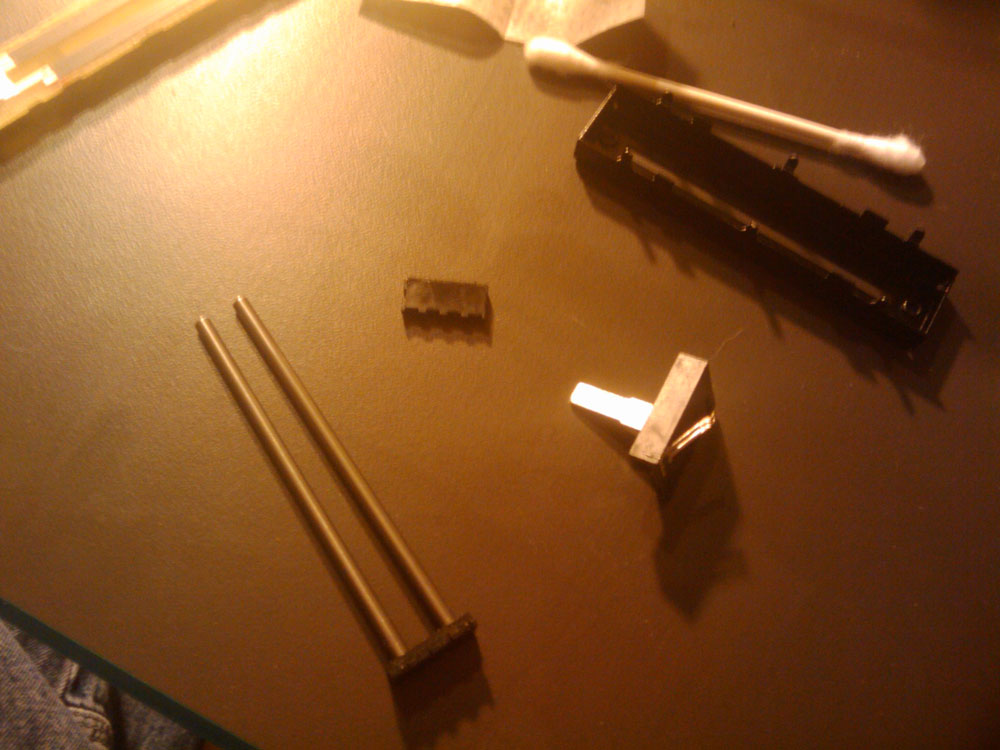
Once you take everything apart, it’ll look similar to this
But, we’re not done yet. You can take it apart further, and remove the metal rods from their holders and the cross fading unit itself. This of course leaves you with even more parts strewn around your work area.

Now all you have to do is clean every piece with your alcohol. This was made easier for me with the pads from the first aid kit because I could literally wrap them around the metal bars and wipe them down. There was a lot of gunk on mine, including cat hair which I’m sure didn’t aide in the mixing abilities.
Once it’s all cleaned, put it back together exactly how you took it apart. Make sure to be careful with the metal pieces that are holding the circuit board in. Two of mine broke when I was re-crimping them around the fader unit. You’ve been warned again.
The trickiest part is going to be soldering it back onto the board. You might want to invest in a solder sucker to get all that old solder off. Alternatively, if you’re cheap like me you can use any regular wire you have around the house and heat up the hole on the circuit board and shove the wire through. Once the solder hardens you can usually just pull the wire out and it will bring the solder with it. This leaves you a nice clean hole to put the contacts back through.
Finish up by soldering everything back in place, and attaching the wires back to the cross fader inside the VCI-100.
Now would be a good time to fire up Traktor or whatever software you use, and plug the VCI-100 in. Make sure the cross fader is working as you expect it to. If it is, then you’re all set and can finish putting everything back together.
If it’s not working – I don’t know what to tell you besides try cleaning it again, or purchase yourself a new cross fading unit to replace it with.
Hope this tutorial helps someone else with a VCI-100 with a wonky cross fader.
Now, get mixin!